User Guide
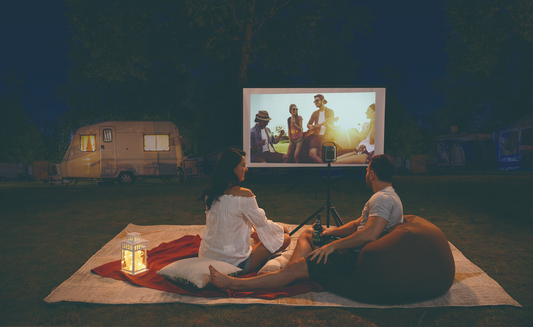
How to Create the Perfect Backyard Theater with...
Setting up a backyard movie night can be hard. Pictures can look dim, sound can be too low, and the setup can take too much time. Portable projectors have improved...
How to Create the Perfect Backyard Theater with...
Setting up a backyard movie night can be hard. Pictures can look dim, sound can be too low, and the setup can take too much time. Portable projectors have improved...

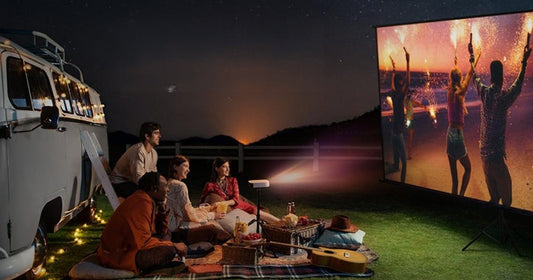
How to Make the Sound Better on a Portable Proj...
Portable projectors make it easy to set up a big screen almost anywhere, but sound is the first thing that disappoints. Most versions have small built-in speakers that don't have...
How to Make the Sound Better on a Portable Proj...
Portable projectors make it easy to set up a big screen almost anywhere, but sound is the first thing that disappoints. Most versions have small built-in speakers that don't have...
A Guide on How to Power a Projector Outdoors
Planning an outdoor movie night or presentation? Wondering how to power a projector when there's no wall outlet in sight? You’re not alone. Many people face this challenge when setting...
A Guide on How to Power a Projector Outdoors
Planning an outdoor movie night or presentation? Wondering how to power a projector when there's no wall outlet in sight? You’re not alone. Many people face this challenge when setting...

Best Travel Projector of 2025: Compact & Powerf...
Portability, image quality, and advanced features are what you can expect from the best travel projector. Compact designs with high resolution ensure that you can enjoy crisp, vibrant visuals wherever...
Best Travel Projector of 2025: Compact & Powerf...
Portability, image quality, and advanced features are what you can expect from the best travel projector. Compact designs with high resolution ensure that you can enjoy crisp, vibrant visuals wherever...
Top RV Camping Setup Ideas to Elevate Your Outd...
Turning any RV campsite into a pleasant haven depends on the proper setup. The right equipment, items, and arrangements will provide simplicity in setting everyone up, enough room to unwind,...
Top RV Camping Setup Ideas to Elevate Your Outd...
Turning any RV campsite into a pleasant haven depends on the proper setup. The right equipment, items, and arrangements will provide simplicity in setting everyone up, enough room to unwind,...
Camping Set Up Ideas To Elevate Every Trip
Transform your next outdoor trip by having the proper camp set-up and gear. You can make dining, sleeping, and other outdoor activities comfortable and fun. It also lets you keep...
Camping Set Up Ideas To Elevate Every Trip
Transform your next outdoor trip by having the proper camp set-up and gear. You can make dining, sleeping, and other outdoor activities comfortable and fun. It also lets you keep...