Join Us

Home / Blog / User Guide

  • User Guide ·

How to Connect iPhone to Projector Like a Pro

User Guide · 28/11/2024

How to Connect iPhone to Projector Like a Pro

The iPhone, with its vast array of functionalities, is not just a communication device but also a powerful tool for presentations, education, and entertainment. Magnifying its display onto a larger canvas, like a projector screen, can elevate your viewing experience and captivate a larger audience. If you're wondering how to connect your iPhone to a projector, you're in the right place. In this comprehensive guide, we'll walk you through both wireless and wired methods for connecting your iPhone to a projector, offering clear guidance to ensure a smooth experience. How to Connect iPhone to Projector Wirelessly? 1. Via AirPlay and Apple TV Directly connecting your iPhone to a projector through AirPlay is not always possible because most projectors lack AirPlay support. A viable alternative is to link your iPhone to an Apple TV, which can then be connected to the projector. Here's how: Ensure you have an Apple TV, and a compatible projector, and both devices are powered on. Connect your iPhone, Apple TV, and projector to the same Wi-Fi network. Swipe down from the upper-right corner to open Control Center on your iPhone. Tap "Screen Mirroring" in Control Center, then choose your Apple TV. On your TV, accept the screen sharing request. Your iPhone screen will now be wirelessly projected onto the Apple TV. Use an HDMI cable to connect the Apple TV to the projector. On the projector, choose the HDMI input that corresponds to the connected Apple TV, and then you have finished screen mirroring iPhone to project. But if you have an iPhone projector, which supports AirPlay, you can mirror iPhone to projector easily. You just need to tap "Screen Mirroring" in Control Center, then choose your projector. And voila, your iPhone is mirrored on the projector. Guide Tutorial: Watch the video to learn how to mirror or cast from a Phone 2. Via Chromecast If you're not in the Apple ecosystem, don't worry; you can still enjoy wireless connectivity with Chromecast. It is the easiest method to screen mirror iPhone to projector wirelessly: Connect your Google Chromecast to the HDMI input on your projector. Ensure your iPhone and Chromecast are connected to the same Wi-Fi network. Download the Chromecast app on your iPhone. Open the app, select your Chromecast device, and tap "Cast my screen." Your iPhone screen should now appear on the projector. 3. Via AllCast AllCast, like AirPlay, can't directly connect your iPhone to the projector. Instead, download the AllCast app on an intermediary device (DNLA-compatible devices, Xbox One, Xbox 360, Amazon Fire TV, Roku, or Google Chromecast), and connect it to your projector. Follow the steps below: Ensure your projector is connected to a compatible device like Xbox, Amazon Fire TV, Roku, or Google Chromecast using the appropriate input (e.g., HDMI). Download and install the AllCast app on a compatible device. Ensure your iPhone, compatible device, and projector are all connected to the same Wi-Fi network. Open Control Center on your iPhone, tap "Screen Mirroring," and select the compatible device from the list. Your iPhone screen is now wirelessly mirrored on the projector through the compatible device. How to Connect iPhone to Projector with Cable? 1. HDMI Cable For a reliable and high-quality connection, you can't beat the simplicity of connecting iPhone to projector via HDMI: Plug one end of the HDMI cable into your iPhone using a Lightning to HDMI adapter. Connect the other end of the HDMI cable to the projector. Change the projector source to HDMI. Your iPhone screen will now be displayed on the projector. 2. VGA Cable If your projector doesn't have an HDMI port, you can use a VGA cable instead, which is another method to mirror iPhone to projector without WIFI: Connect the VGA adapter to your iPhone. Plug the VGA cable into the adapter. Connect the other end of the VGA cable to the projector's VGA port. Change the projector source to VGA. Your iPhone screen should be visible on the projector. Tips for Connecting Projector to iPhone Now that you know various methods on how to use projector with iPhone, here are some essential tips to ensure a seamless experience: Check Compatibility: Make sure your projector and iPhone are compatible with the chosen connection method. Choose the right App or ensure you have the correct adapter for your iPhone model. For most recent iPhones, you'll need a Lightning to HDMI or VGA adapter. Keep Software Updated: Ensure your iPhone, projector and any related apps or devices have the latest software updates installed. Sometimes, compatibility or connection issues might arise from outdated software. Use a Stable Wi-Fi Network: For wireless connections, a stable Wi-Fi network is crucial to avoid interruptions during screen mirroring. When using "Screen Mirroring" to wirelessly connect to the projector, ensure both devices are on the same network. Invest in Quality Cables: If you opt for a wired connection, invest in high-quality cables and adapters for the best results. Adjust Settings: Experiment with screen resolution and aspect ratio settings to ensure your content displays correctly on the projector. Prepare for Sound: If you want to hear audio through the projector, check the audio source settings on both your iPhone and the projector. When opting for a wired connection, remember that only HDMI provides sound. With a VGA adapter, you won't get audio. Keep Your iPhone Charged: Screen mirroring can drain your iPhone's battery, so keep it charged or use an external power source. Conclusion Connecting your iPhone to a projector can open up a world of possibilities for sharing content, from presentations to movie nights. Whether you prefer a wireless or wired connection, there are multiple options available to suit your needs. With the knowledge and guidance provided in this blog, you should now be well-equipped to connect your iPhone to a projector hassle-free, ensuring you can enjoy your favorite content on the big screen whenever you want. Additionally, if you own an Android phone instead of an iPhone, we still have a guide on how to connect phone to projector for you. FAQ Why Won't My iPhone Screen Mirror to My Projector? There could be several reasons why your iPhone won't screen mirror to your projector. Common issues include: Incompatible Devices: Ensure that your projector and iPhone are compatible with the chosen connection method. Software Updates: Check for updates on both your iPhone and projector to ensure compatibility. Network Issues: For wireless connections, a stable Wi-Fi network is essential. Settings: Review your settings, including screen resolution and audio source settings. Cables and Adapters: If using a wired connection, make sure your cables and adapters are in good condition. Can You AirPlay to a Projector? Yes, you can AirPlay to a projector if you have an Apple TV or a projector that supports AirPlay. Simply connect your iPhone and Apple TV or compatible projector to the same Wi-Fi network, enable AirPlay on your iPhone, and select the target device to start screen mirroring. Can you screen mirror Netflix from iPhone to projector? You can screen mirror Netflix from an iPhone to a projector using AirPlay or an HDMI adapter. However, Netflix may block mirroring due to DRM restrictions. Instead, use a projector with a built-in Netflix app or connect a streaming device like Roku or Chromecast for seamless playbackTo connect a projector to an iPhone using a dongle, use a Lightning to HDMI or VGA adapter, depending on the projector's input. Plug the adapter into the iPhone's Lightning port, then connect the projector with an HDMI or VGA cable. Select the correct input on the projector to display. How to use a dongle to connect a projector to iPhone? To connect a projector to an iPhone using a dongle, use a Lightning to HDMI or VGA adapter, depending on the projector's input. Plug the adapter into the iPhone's Lightning port, then connect the projector with an HDMI or VGA cable. Select the correct input on the projector to display.

Screen Mirroring Not Working on Projector - A Comprehensive Solution Guide

User Guide · 25/11/2024

Screen Mirroring Not Working on Projector - A Comprehensive Solution Guide

Screen mirroring is a popular and convenient way to share the content from our devices on a larger screen. Whether it's for business presentations or streaming your favorite content at home, projectors have become essential tools for this purpose. However, the frustration sets in when you encounter the dreaded issue: "screen mirroring not working on projector." In this guide, we will delve into the reasons behind this problem and explore solutions to get your screen mirroring back on track. Let's troubleshoot and get your projector and devices working seamlessly together. {{ "component":"activity", "type": "global" }} why is my screen mirroring not working Why won’t my screen mirroring work? Screen mirroring can be a remarkably convenient feature, but it can sometimes be frustrating when it fails to work as expected. Let's delve into the common reasons why your screen mirroring might not be functioning correctly. Projector Connectivity Issues: Projector Cable Problems: Damaged or loose cables can disrupt the signal in a wired connection. A critical issue when screen mirroring not working. Incorrect Input Source: Selecting the wrong input source on the projector can lead to screen mirroring issues. Adapter Compatibility Issues: Incompatible adapters can result in connectivity problems. Device Compatibility Problems: Incompatibility between your source device, such as iPhone, and the projector regarding supported mirroring standards can lead to issues. Often, this is the cause when iPhone screen mirroring not working. Outdated Software or Firmware: Compatibility problems may arise from outdated software or firmware on your source device or projector. This is also a common issue when screen mirroring not showing up. Network Problems: Weak Wi-Fi Signal: A weak or unstable Wi-Fi signal can lead to buffering and disruptions during screen mirroring. A frequent problem when screen mirroring won't connect. Network Configuration Issues: Network settings like firewalls or security configurations might interfere with screen mirroring. These are the primary reasons why your screen mirroring may not be working as expected. Addressing these issues requires specific troubleshooting and solutions.. how to fix screen mirroring issues Screen mirroring not working can be a frustrating issue, but there are steps you can take to troubleshoot and resolve the issues. In this section, we'll explore various methods to fix screen mirroring. Troubleshooting Steps: Restart Your Devices: A simple but often effective solution is to restart both your source device and the projector. Power cycling can clear minor glitches and reestablish connections. Check Cable Connections: If you're using a wired connection, inspect the cables for damage, and make sure they are securely connected. A loose cable can disrupt the signal. Try Another Screen Mirroring Standard: If one standard, such as Miracast or AirPlay, is not working well, experiment with another standard to see if it resolves the issue. Test with a Different Source Device: To rule out problems with the source device, try screen mirroring from another compatible device. If it works, the issue may be with the original device. Verify Source Device Settings: Review the screen mirroring settings on your source device. Make sure it is set to mirror its display on the smart projector. Updating Software and Firmware: Update Source Device: Check for software updates on your source device, whether it's a smartphone, tablet, or computer. Manufacturers frequently release updates to improve compatibility and performance. Update Projector Firmware: Similar to source devices, projectors receive firmware updates that can enhance their functionality and compatibility. Visit the manufacturer's website to find and install any available firmware updates. Checking Network Settings: Strengthen Wi-Fi Signal: If you're using a Wi-Fi-based screen mirroring method, ensure that your source device has a strong and stable Wi-Fi connection. You can reposition your device or invest in a Wi-Fi range extender to enhance the signal. Network Configuration: Review your network settings, especially any firewalls or security configurations. Ensure that network settings are not blocking the necessary network traffic for screen mirroring. Adjust your router's settings to allow the required traffic if needed. Use a Dedicated Network: Consider using a separate and dedicated Wi-Fi network for screen mirroring. This can help reduce interference and improve the reliability of the connection. By following these troubleshooting steps, updating your software and firmware, and optimizing your network settings, you can often resolve screen mirroring issues and enjoy a smooth experience when projecting your device's content onto a larger screen. Conclusion By understanding how to screen mirror to a projector and addressing the potential problems that arise, you can ensure a seamless and frustration-free experience, making your work presentations more engaging, your movie nights more immersive, and your sharing of content more seamless. So, the next time you face the dilemma of "screen mirroring not working on projector," refer back to this guide and apply the knowledge you've gained to overcome the obstacles and enjoy the benefits of screen mirroring without interruption. FAQs  how does screen mirroring work? Screen mirroring is a technology that allows you to display the screen of one device on another. It typically involves wireless communication protocols like Miracast or AirPlay, where one device (the sender) transmits its screen content to another (the receiver). This allows you to share videos, presentations, or apps from your device on a larger screen, such as a TV or projector. why is my airplay not working? AirPlay may not work due to incompatible devices, network issues, or software problems. Ensure compatibility, check your Wi-Fi network, and update software for a potential resolution.

How to Connect Phone to Projector Wirelessly: Step-by-Step Guide

User Guide · 25/11/2024

How to Connect Phone to Projector Wirelessly: Step-by-Step Guide

The ability to connect projector wirelessly with our smartphones is not just a convenience, but a necessity. Whether you're giving a presentation, watching a movie, or sharing photos with friends and family on a large screen, connecting your phone to a projector wirelessly allows you to easily mirror your phone's screen without fumbling with cables. So, how can you do that? In this guide, we'll walk you through four effective methods on how to connect phone to projector wirelessly, including Wi-Fi Direct, AirPlay, Miracast, and Chromecast. We'll also delve into troubleshooting common issues, ensuring you're well-equipped to handle any hiccups along the way. {{ "component":"activity", "type": "global" }} How To Connect Your Phone to A Projector Wirelessly Connecting your phone to a projector wirelessly is a highly convenient method for displaying presentations, videos, photos, or any other content on a larger screen. Here are the most common methods to achieve this phone to projector wireless connection: Wi-Fi Direct Connection Wi-Fi Direct is a convenient method that allows you to connect your phone directly to a projector without the need for a Wi-Fi router. This is often the preferred method to connect Android phone to projector wirelessly, as Wi-Fi Direct is integrated into all Android phones. To use this method, you'll need a Wi-Fi projector equipped with Wi-Fi Direct capability. So, check the detailed specifications or user manuals of your projector to verify. Here's how to use it: Activate Wi-Fi Direct on Your Projector: Navigate to the network settings menu of your projector and look for the Wi-Fi Direct option. Activate it, and the projector will start broadcasting its own Wi-Fi network. Connect Your Phone to the Projector: Open the Wi-Fi settings on your phone. You should see the projector's Wi-Fi Direct network listed among the available networks. Connect to it as you would with any Wi-Fi network, entering a password if required. Mirror Your Screen: Once the connection is established, access the screen mirroring feature on your phone. This option is typically found in the display settings or the quick settings panel. Select your projector from the list of available devices to start mirroring your screen. Airplay Connection For iPhone users, AirPlay offers a seamless way to build a wireless connection to projector. This method requires that both the projector and your iPhone are connected to the same Wi-Fi network: Check for AirPlay Compatibility: Check if your projector has built-in AirPlay support. If not, you may need an external device like an Apple TV to enable AirPlay functionality. Connect to the same Wi-Fi network: Make sure both your iPhone and the projector are connected to the same Wi-Fi network. This is essential for AirPlay to work. Use Screen Mirroring: Swipe down from the upper right corner of your screen (on iPhone X or later) or up from the bottom edge (on iPhone 8 or earlier) to access the Control Center. Tap on the "Screen Mirroring" option and select your projector or connected Apple TV from the list. Your iPhone's screen will now be mirrored on the projector. Miracast Miracast is a wireless standard that allows Android phones to connect to a projector wirelessly. It creates a direct connection between the two devices, similar to Wi-Fi Direct: Check Compatibility: First, ensure both your Android phone and projector support Miracast. This is usually indicated in the device specifications. Enable Miracast on Your Projector: Look for the "Miracast" or "Wireless Display" option in your projector's settings and enable it. This makes your projector visible to your phone. Connect Your Phone: On your Android phone, go to Settings > Display > Cast (the pathway might vary depending on your device). Your device will search for the projector. Once your projector appears in the list, tap on it to initiate the connection. After a brief moment, your phone's screen should be mirrored on the projector. Guide Tutorial: Watch the video to learn how to mirror from a phone Chromecast Chromecast is popular method for casting content from smartphones to larger screens, compatible with all Android devices. Many modern projectors, like the Nebula Capsule 3, now come with Chromecast built-in, simplifying the process of streaming content directly from your phone. Here's how to connect: Verify Compatibility: Ensure that your projector's specifications mention Chromecast support. This allows for a seamless connection without additional hardware. Connect Your Phone: Both your Android smartphone and the projector need to be connected to the same Wi-Fi network. Open an app that supports Chromecast – such as YouTube, Spotify, or Google Slides – and tap on the "Cast" icon (it looks like a screen with Wi-Fi waves). Select your projector from the list of available devices. Start Casting: Once connected, your selected content will start playing on the projector. You can control the playback directly from your phone. If your projector lacks built-in Chromecast, you can also plug a Chromecast streaming device into an HDMI port on your projector to enable this feature. Here's how to use it: Plug in the Chromecast Device: Connect the Chromecast device to your projector's HDMI port and power it on. Set Up the Chromecast: If it's your first time using Chromecast, follow the setup instructions using the Google Home app on your phone. This involves linking the Chromecast to your Wi-Fi network and configuring it for use. Cast Content: Open a compatible app you want to cast from on your phone and look for the "Cast" icon. Tap on it and select your Chromecast device. Your phone's screen will now be displayed through the projector. Screen Mirroring Option: For full screen mirroring, use the Google Home app to select your Chromecast device and choose the "Cast my screen" option. This mirrors your phone's display onto the projector, ideal for browsing, gaming, or displaying apps not directly supporting Chromecast.   Troubleshooting Common Issues Connecting your phone to a wireless phone projector using these methods can be a convenient way to share presentations, videos, or photos with a larger audience. However, occasional hiccups can occur. If you're having trouble connecting to projector wirelessly, here are some common issues and their solutions to help you resolve them swiftly: Device Not Found If your phone cannot find the projector or vice versa, ensure both devices are compatible with the connection method you're trying to use (e.g., Wi-Fi Direct, AirPlay, Miracast, Chromecast). Also, check that both devices are on the same Wi-Fi network if you are using AirPlay or Chromecast. Try restart both devices to refresh their network discovery capabilities. Unstable or No Connection An unstable connection or failure to connect can often be attributed to network issues or interference. Move closer to the router or projector to ensure a stronger Wi-Fi signal. Check for interference from other Wi-Fi networks or devices and try switching to a different Wi-Fi channel or frequency. Additionally, restarting your router to clear any network congestion can also help. Poor Video/Audio Quality If you're experiencing lag, buffering, or low-quality video or audio, this could be due to network bandwidth or device performance. Try closing unnecessary apps on your phone to free up resources. Check your network speed and ensure it's sufficient for high-quality streaming. Consider upgrading your internet plan if necessary. Reduce the streaming quality settings if possible to accommodate lower bandwidths. Compatibility Issues Sometimes, devices might not be compatible due to different standards or outdated software. Check for and install any available updates for your phone and projector firmware. If you are using Wi-Fi Direct or Miracast to link your phone to projector with wireless connection, verify that both devices support the latest version of the technology. If you're still experiencing issues, consider using a third-party app that can bridge compatibility gaps between your phone and projector. Conclusion Understanding how to connect phone to projector wirelessly can greatly enhance your multimedia experiences, whether for professional presentations, educational purposes, or personal entertainment. Throughout this guide, we've explored a variety of methods - Wi-Fi Direct, AirPlay, Miracast, and Chromecast - to help you find the solution that best fits your needs. We've also tackled some common troubleshooting issues to ensure you're well-prepared for any hiccups along the way. Remember, the key to a successful connection lies in understanding the compatibility of your devices and the steps involved in each method. So, go ahead, connect your phone to your projector wirelessly, and unlock a new dimension of visual experience. FAQ Can all phones connect to a projector wirelessly? No. Not all phones can connect to a projector wirelessly. The capability depends on the phone’s hardware and software compatibility with the projector’s wireless technology. Most modern smartphones with Wi-Fi and screen mirroring or casting features can connect to wireless projectors. However, older models or those with limited connectivity options may not support wireless projection. Do I need a special app to connect my phone to a projector wirelessly? No, you do not necessarily need a special app to connect your phone to a projector wirelessly. Many modern smartphones and projectors support technologies like Wi-Fi Direct, Chromecast, or AirPlay that allow for wireless connection without the need for an additional app. However, the exact method can vary depending on the brand and model of your phone and projector. In other cases, you do need a dedicated app to facilitate the connection. How can I connect my phone to a projector without USB? To connect your phone to a projector without a USB, consider these methods: Use wireless technologies like Miracast or AirPlay for direct screen mirroring, or an HDMI adapter to link your phone's USB-C or Lightning port to the projector. Alternatively, explore dedicated apps provided by projector manufacturers for a seamless connection, or employ streaming devices like Chromecast by plugging them into the projector and casting from your phone.  

Your Projector Says No Signal HDMI? Let’s Solve It!

User Guide · 25/11/2024

Your Projector Says No Signal HDMI? Let’s Solve It!

Suppose you've set up the perfect movie night or a crucial business presentation, and just when you're ready to hit play, the projector says no signal HDMI. Why? Why does my projector say no signal? This is indeed a frustrating situation. Fortunately, we can find several troubleshooting steps to get the HDMI connection back on track. In this blog post, we'll explore the most common causes for this problem, and provide practical solutions to ensure your next movie night or presentation goes off without a hitch. Let's dive in and resolve the problem of no signal on projectors together!   {{ "component":"activity", "type": "global" }} Why Projector Says No Signal HDMI So, what exactly are the reasons that cause the projector no signal problem? Generally, the most common factors are listed below: Not Configuring Display Setting One of the frequent but easily overlooked culprits behind the HDMI no signal projector is the failure to configure the display settings on your laptop or source device properly. Often, laptops default to their built-in screens and won’t send signals to other devices like a projector, even if the projector is in fact connected to the laptop. Thus, there is no HDMI signal from your device in the first place, so it is a sure thing that the projector won’t receive anything to display. HDMI Splitter Not Working Properly An HDMI splitter can send an HDMI signal from a single source (usually your laptop) to multiple receiving devices. However, if you're using an HDMI splitter to connect multiple devices to the projector, this component might be the source of the problem. Sometimes the HDMI splitter tends to malfunction and cause the projector to receive no signals and display a “No Signal" error on the projector. Faulty HDMI Connection A loose or damaged HDMI cable can also be a primary reason for the "projector saying no signal" issue. A damaged cable can’t send the signal through to the projector, while a loose connection affects the proper receiving of the signal by the projector. Moreover, it can also happen that the HDMI ports are damaged and thus not functioning. Incompatible Resolution An incompatible resolution could also be behind the "No Signal HDMI" issue. Projectors have specific resolution capabilities. For instance, the Nebula Capsule 3 Laser supports a maximum resolution of 1920×1080. If the resolution of the source exceeds the maximum supported resolution of the projector, the projector will probably not be able to recognize the signal, let alone display it. A "No Signal HDMI" message can therefore ensue.   What to Do When Projector Says No Signal We have just explored several common factors of projectors not displaying HDMI. Now let's see some methods to address these problems so that your projector can receive signal and display the content properly: Configure Laptop Display Setting To resolve the issue of "No Signal HDMI," start by configuring your laptop or source device's display settings. Ensure that the display mode is set to extend or duplicate the screen on the projector, rather than the default “PC screen only”. In this way, you are telling your laptop that it should send the HDMI signal to the projector so that projection is possible. Remove HDMI Splitter If you're using an HDMI splitter, it might be causing the no signal problem, although the exact mechanism is often unclear. It could be that the splitter itself is faulty, or that there is a compatibility issue. Anyway, try disconnecting the HDMI splitter and directly connect your source device to the projector using a single HDMI cable if a no signal message appears. This eliminates any potential issues arising from the splitter. Secure the Connection Ensure that the HDMI cable is securely plugged into both your source device and the projector. Typically, simply unplugging and re-plugging the cable is enough to resolve this issue perfectly. However, if this does not work, it could be that either the cable or the HDMI port is faulty. In this case, it's essential to check for any visible damage on the cable and replace it if necessary. You can also try using another available HDMI port to rule out the possibility that the HDMI port on your source is malfunctioning. Reset Resolution of the Source The resolution mismatch can cause the "No Signal HDMI" problem. Double-check your source device's resolution settings and set it to a resolution that is compatible with your projector's native resolution. Adjusting this setting ensures that the source device's output aligns with the projector's capabilities, facilitating a successful HDMI connection.   Conclusion No one wants to be disrupted by a sudden “no signal HDMI” message while anticipating your movie night with brimming joy. This is why this blog came into being. By understanding the common factors that lead to this issue and following the practical steps to address them, you can minimize these interruptions and ensure a seamless viewing or presentation experience. So, next time you gather for movie night or an important presentation, rest assured that you won’t utter “my projector says no signal HDMI” in frustration again, and your projector will deliver a flawless performance. FAQ Why is my computer not detecting my projector? Check cable connections and ensure the correct input is selected on the projector. On your computer, adjust display settings to detect the projector (Windows: right-click desktop > Display Settings > Detect; Mac: System Preferences > Displays > Detect Displays). Update graphics drivers, try different cables/ports, and test the projector with another device to isolate the issue. Why is my HDMI connected but says no signal? If your HDMI is connected but showing "No Signal," try these steps: Re-seat the HDMI cable:Disconnect and reconnect the cable securely on both the source device and projector. Try a new cable:If the issue persists, test with a different HDMI cable. Switch HDMI ports:Connect the source to another HDMI port and adjust the projector input accordingly. What to do if HDMI is not working on a projector? There are several troubleshooting tips you can use to resolve the issue of HDMI not working and get back to enjoying your content: Inspect the HDMI Cable: Start by examining the HDMI cable thoroughly. Inspect for any apparent damage, such as twisted pins, worn cables, or disconnected connectors. If you identify any issues, replace the cable with a new one. Check Display Setting: Ensure that your source device (e.g., laptop, DVD player) is set to duplicate or extend the display to the projector. Additionally, confirm that the resolution settings on your source device are compatible with the projector's capabilities. Test with Another Source Device: You can also consider connecting a different source device with an HDMI output to your projector. This will help determine whether the issue is specific to the original source device or if the projector itself is causing the problem. What source to use for a projector? The choice of source for your projector depends on your specific needs. Common sources include laptops, desktop computers, gaming consoles, DVD or Blu-ray players, streaming devices, and even smartphones or tablets with HDMI output capabilities. But no matter what source you use, make sure that the source content is compatible with your projector to ensure proper projection.

Easy Steps on How to Reset Chromecast: A Comprehensive Guide

User Guide · 25/11/2024

Easy Steps on How to Reset Chromecast: A Comprehensive Guide

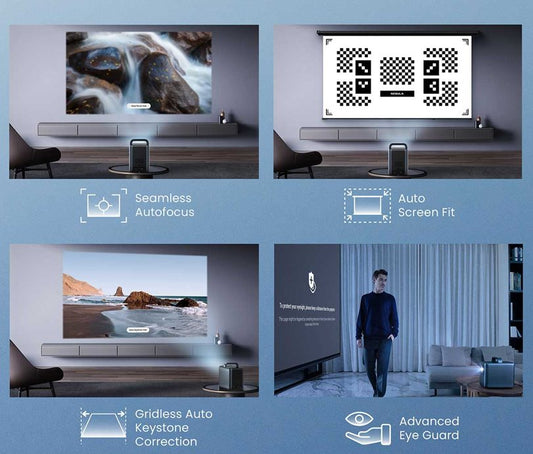
In our digitally connected world, streaming devices like Chromecast have become household staples, transforming our entertainment experiences. However, like any technology, they sometimes encounter glitches that can hinder its performance. Understanding how to reset Chromecast is essential for any user looking to maintain a seamless streaming experience. In this comprehensive guide, we delve into the reasons behind the need for resetting your Chromecast, provide step-by-step instructions on how to perform both soft and hard resets, and explore alternatives for those rare instances where a reset doesn't solve the problem. This article is designed to assist all levels of users, from those new to technology to those who occasionally need a quick reference, in troubleshooting their Chromecast effectively, keeping their streaming sessions uninterrupted and enjoyable. {{ "component":"activity", "type": "global" }} Why Do You Need to Reset Chromecast? Resetting a Chromecast device can often seem like a task reserved for troubleshooting experts. However, it's a simple yet effective step that every user should be familiar with. Here are some key scenarios where a reset might be necessary: Performance Issues:Over time, your Chromecast may experience lag, stuttering, or buffering during streaming. This can be due to memory clogs or software glitches that accumulate with prolonged use. A reset can clear these issues, providing a fresh start for smoother operation. Connectivity Problems:Chromecast relies on a stable Wi-Fi connection to function correctly. If you encounter difficulties in connecting your device to the Wi-Fi network, or if it frequently disconnects, a reset could resolve these connectivity issues by refreshing the network settings. Software Updates:Sometimes, a reset is necessary to ensure that your Chromecast successfully installs the latest firmware updates. These updates are vital for security, performance improvements, and new features. Resetting can help in the proper application of these updates if they don't install automatically. How to Soft Reset Chromecast Soft resetting your Chromecast is a straightforward process that can resolve various issues without deleting any of your data or settings. Here's how you can perform a soft reset on your Chromecast: How to Restart Chromecast Using the Google Home App: Ensure your mobile device or tablet is linked to the same account as your Chromecast. Open the Google Home app. Find and long press the tile for your Chromecast device. In the top right corner, tap on 'Settings'. Scroll down and select 'More settings'. Choose 'Reboot' to initiate the soft reset. How to Reboot Chromecast from the Power Source Simply unplug the power cable from your Chromecast device. Wait for about one minute. Plug the power cable back in. Note: Unplugging the Chromecast from the TV's HDMI port does not reboot the device. It must be disconnected from the power source. How to Reboot Chromecast with Google TV If you're using the latest Chromecast with Google TV, soft resetting is even simpler with the use of your Chromecast Voice Remote. Utilize your Chromecast Voice Remote. In the upper right of your TV screen, select your profile, then go to 'Settings'. Choose 'System'. Select 'Restart', then confirm by selecting 'Restart' again. By following these steps, you can effectively soft reset your Chromecast device, which often resolves temporary glitches or performance issues without the need to undergo a complete factory reset. How Do You Hard Reset Chromecast After trying a soft reset, if your Chromecast is still not functioning as expected, a hard reset or factory reset might be necessary. This process will return your Chromecast to its original factory settings, erasing all your data, settings, and personal preferences. Here's how to factory reset Google Chromecast: How to Reset Google Chromecast via Google Home App Ensure your mobile device or tablet is connected to the same Wi-Fi network as your Chromecast. Open the Google Home app. Tap and hold the tile of your Chromecast device. In the top right, tap 'Settings', then 'More', and select 'Factory reset'. Confirm the action by tapping 'Factory reset' again. How to Reset Chromecast via Remote Use the Chromecast Voice Remote On the top right of your TV screen, select your profile and then 'Settings'. Select 'System', then 'About', and choose 'Factory Reset'. How to Factory Reset Chromecast without App If the above methods via the Google Home app or your remote are not feasible, you can also perform a hard reset using the physical button on the Chromecast device. This method is a direct approach to reset your device to its factory settings. The steps vary slightly based on different Chromecast models. For the latest Chromecast with Google TV: While the Chromecast is plugged into the TV and powered, press and hold the button on the back of the Chromecast. The LED should start to blink yellow. When the LED light turns solid white, release the button to reset. For Chromecast (2nd, 3rd Gen), or Chromecast Ultra Find the reset button on the side of your device near the power cable. While the Chromecast is plugged into the TV and powered, hold down the button. The LED should begin to blink orange. When the LED light turns solid white, release the button, and the Chromecast will reset. For Chromecast (1st Gen): Locate the reset button on the back of your device. While the Chromecast is plugged into the TV and powered, hold down the button on the Chromecast device for at least 25 seconds or until the solid LED light flashes red. Once the LED light blinks white and the TV goes blank, release the button. The device should then reset. By following these steps, you can perform a hard reset on your Chromecast device, effectively returning it to its initial state. Remember, a factory reset is irreversible, so ensure all necessary data is backed up before proceeding. What to Do If Resetting Chromecast Doesn't Work Despite the effectiveness of both soft and hard resets in resolving many Chromecast issues, there are times when these methods may not work. If you find yourself in this situation, don't worry; there are still options to consider. Here's what you can do if resetting your Chromecast doesn't solve the problem: Check Your Network:Ensure your Wi-Fi network is stable and functioning correctly. Sometimes, issues with Chromecast can be attributed to network problems rather than the device itself.  Update Your Apps and Devices:Make sure that all related apps and your mobile device's operating system are up to date. Outdated software can cause compatibility issues with Chromecast. Contact Support:If you've tried all troubleshooting steps and your Chromecast is still not working, it may be time to contact Google Support for further assistance. They can provide more in-depth solutions or identify if there's a hardware issue with your device. Consider a Replacement:If your Chromecast is old or out of warranty, it might be more cost-effective to replace it than to attempt further repairs. Alternative Solutions – Projectors with Built-in Chromecast:If you're considering a replacement, at Nebula, we offer a compelling alternative that combines the convenience of Chromecast with the grandeur of a big screen.   The Nebula Capsule 3 is a testament to our commitment to portability and quality. This ultra-portable Google TV Chromecast Projector, licensed by Netflix, brings the cinematic experience right into your home or wherever you go. We've ensured that it delivers a superior viewing experience with its 1080p display, capable of projecting up to a 120-inch image with 200 ANSI lumens of brightness, for vivid and clear visuals. Our commitment to convenience is further exemplified by the Capsule 3's long battery life and user-friendly setup. With features like auto-focus and keystone correction, it's designed for effortless use. The Nebula Capsule 3 represents our dedication to providing portable, high-quality projectors with built-in Chromecast capabilities, making it an ideal choice for uninterrupted streaming. Conclusion As we conclude our journey through the nuances of how to reset Chromecast, it's clear that understanding these procedures is crucial for any Chromecast user. From exploring why resets are sometimes necessary to walking through the steps of both soft and hard resets, we've covered essential aspects to help you tackle common Chromecast issues. However, if you find yourself at a crossroads where resetting your Chromecast doesn't rectify the issue, considering a projector with built-in Chromecast like our Nebula Capsule 3 could be a viable alternative, offering you an upgraded experience with fewer hassles.  FAQ How to change Wi-Fi on Chromecast? To change the Wi-Fi network on your Chromecast, follow these steps: Open the Google Home app on your device that's linked to the same account as your Chromecast. Select your Chromecast device from the app. Tap 'Device information', then 'Wi-Fi', and choose 'Forget this network' to disconnect from the current network. Return to the home screen of the Google Home app and set up your Chromecast again, this time connecting it to the new Wi-Fi network. Will resetting Chromecast delete installed apps? Yes, performing a factory reset on your Chromecast will delete all installed apps. This type of reset restores the device to its original factory settings, erasing all data, including any apps you've installed, your customized settings, and linked accounts. It's crucial to distinguish between a factory reset and a soft reset or reboot; the latter simply restarts the device without removing any personal data or apps. Therefore, if you proceed with a factory reset, be prepared to reinstall and reconfigure your apps once you set up your Chromecast again. 

How to Connect Phone to Projector via USB: Step-by-Step Instructions

User Guide · 25/11/2024

How to Connect Phone to Projector via USB: Step-by-Step Instructions

Sharing content from our phones on a larger screen is often a necessity in today's digital age. Whether you're a professional presenting a slide deck, a teacher sharing educational content, or simply wanting to enjoy your personal media on a big screen with friends and family, knowing how to connect phone to projector via USB is an invaluable skill. This guide is designed to walk you through the essential steps and considerations for seamlessly connecting your smartphone—be it an Android or an iPhone—to a projector using a USB connection. With a focus on simplicity and practical advice, we'll ensure you're well-equipped to make any presentation or viewing experience smooth and enjoyable. {{ "component":"activity", "type": "global" }} Things To Consider Before Connecting Phone to Projector Before diving into the specific steps of connecting your phone to a projector via USB, it's essential to tick off a few crucial considerations: Compatibility Check The first and foremost consideration is the compatibility between your phone and the projector. Phone Compatibility:Not all smartphones support direct video output to a projector via USB. Android phones might require MHL (Mobile High-Definition Link) or Slimport technology support, allowing them to send audio and video signals through a USB port. On the other hand, iPhones do not natively support USB video output and thus require specific adapters to facilitate this connection. Projector Compatibility:Projectors need to have a compatible input to receive and display content from your phone. This could be a dedicated USB port that supports video input (a USB port labeled "USB-C Video," "MHL," or similar), or an HDMI port that can be used with the appropriate adapter. The projector's documentation should specify supported connection types and standards. Cable and Adapter Requirements Depending on your device, you might need specific cables or adapters to establish the connection. For Android phones that support MHL, an MHL to HDMI adapter might be required. For newer Android phones with USB-C ports that support video output directly, a simple USB-C to USB-C Cable might be enough. For iPhones, a Lightning to USB camera adapter might be necessary. Ensure you have the correct cables and adapters that are compatible with both your phone and projector. The quality of the cables and adapters can affect the stability and quality of the video signal. Opt for high-quality, reliable cables that support both charging and data transmission. Additionally, consider the length of the cables you'll need based on the setup of your presentation or viewing area to avoid unnecessary strain on the connections or devices. Power Supply Connecting your phone to a projector via USB might not supply enough power to charge your phone while it's in use. Some connections might not charge your phone at all. For long presentations or viewing sessions, consider having an external power source or a fully charged phone to avoid interruptions. Resolution and Quality The resolution and quality of the content being projected are crucial to consider. The capabilities of your phone and projector, along with the type of connection established, can significantly affect the output. A direct USB connection may not offer the same quality as HDMI or wireless options, so adjust your expectations and presentation materials accordingly. Audio Output If your presentation includes audio or you plan to watch videos, consider how you will manage the audio output. Some projectors may play audio over their built-in speakers, but for larger rooms or higher quality sound, you may need to connect to external speakers. Check if your projector supports audio over USB or if you'll need an auxiliary audio cable. How to Connect Android Phone to Projector via USB? Connecting your Android phone to a projector via USB involves a few steps and specific requirements to ensure compatibility and optimal performance. Here's how you can do it: Step 1: Check Your Android's Compatibility Before anything else, verify that your Android phone is compatible with video output via USB. This is typically possible through newer USB-C ports that support direct video output capabilities, along with older Micro-USB ports that support technologies like MHL (Mobile High-Definition Link) or Slimport. You can find this information in your phone's specifications or by contacting the manufacturer. Step 2: Gather the Necessary Cables and Adapters Here's a comprehensive look at potential port configurations and the corresponding cables and adapters you might need: USB-C to USB-C Cable: If both your Android phone and the USB projector support video input/output via USB-C, then a simple USB-C to USB-C cable that supports both charging and video/audio transmission is all you need. USB-C to HDMI Adapter: If you have a newer Android phone with a USB-C port that supports video output directly, and you want to connect it to a projector's HDMI input, you'll need a USB-C to HDMI adapter. MHL to HDMI Adapter: If your Android phone has a Micro-USB port that supports MHL and your projector has an HDMI input, an MHL to HDMI adapter will be necessary. Step 3: Connect the Adapters and Cables For a USB-C to USB-C connection, simply connect the cable between your phone and the USB-C projector. If using a USB-C to HDMI adapter, connect the USB-C end to your phone and the HDMI end to the projector. You may need a standard HDMI cable to complete this connection. For an MHL to HDMI setup, attach the MHL adapter to your phone's Micro-USB port, and connect the HDMI end of the adapter to the projector using an HDMI cable. Step 4: Select the Correct Input on the Projector After the physical connection is established, turn on your projector and navigate to its settings. Look for the input source option and select 'USB' or 'HDMI' depending on your connection type. Step 5: Configure Your Android Phone Once the physical connections are established, your phone may automatically detect the projector and mirror its screen. If not, you may need to manually enable this feature: Go to Settings > Display > Cast (the terminology may vary depending on your device). Select the projector from the list of available devices to start mirroring your screen.   How to Connect iPhone to Projector via USB? Connecting your iPhone to a projector via USB involves specific adapters and settings due to the iPhone's unique connectivity options. Here's how to do it: Step 1: Acquire the Necessary Cable or Adapter The cables and adapters you need vary depending on your iPhone model and the projector's available ports: For iPhones with a Lightning Connector: Lightning to USB Camera Adapter: If your USB projector has a USB-C port accepting video input, use a Lightning to USB Camera Adapter. It converts the digital signal from your iPhone's Lightning port and allows you to connect your iPhone to the projector using a standard USB-C cable. Lightning to Digital AV HDMI Adapter: If you have an HDMI projector that only accept HDMI input, a Lightning to Digital AV HDMI Adapter is necessary to convert the signal from your iPhone to HDMI. For latest iPhone 15 models with a Type-C Port: USB-C to USB-C Cable: If both your iPhone and the projector support USB-C for video, a simple USB-C to USB-C cable that supports charging and video/audio transmission is all you need. USB-C to HDMI Adapter: In cases where the projector only has an HDMI input, a USB-C to HDMI Adapter will enable you to connect your iPhone 15 to the projector's HDMI port. Step 2: Establishing the Connection Once you have the correct cables and adapters, it's time to connect your iPhone to the projector: For Lightning-connected iPhones, attach the appropriate adapter to your iPhone and then connect the projector using either a standard USB-C or HDMI cable, depending on the adapter used. For iPhone 15 with USB-C, connect directly with a USB-C to USB-C cable for USB-C supported projectors, or use a USB-C to HDMI adapter for HDMI-only projectors. Step 3: Selecting the Correct Input Source After connecting your iPhone to the projector, you need to ensure that the projector is set to receive input from the right source. Navigate to the projector's input options and select the 'USB' or 'HDMI' input, depending on your connection. This action signals the projector to accept data from the connected iPhone. Step 4: Initiating Projection Once everything is plugged in and the correct input source selected, your iPhone should automatically mirror its display to the projector. If not, swipe down from the top right corner of your iPhone to access Control Center, then tap on ''Screen Mirroring' to select the projector. Adjust the projector and iPhone settings as needed to optimize the display and sound for your content. Bonus Tip: Connect Phone to Projector Wirelessly If you have a smart projector that supports Wi-Fi connectivity, you open up a world of convenience by connecting your phone to the projector wirelessly. This eliminates the need for cables and adapters, offering a sleek and straightforward way to share your screen. Depending on your device and projector, you can use one of the following features: Chromecast: For Android phones, many smart projectors come with built-in Chromecast or support it through apps. This allows you to cast your phone's screen directly to the projector over your Wi-Fi network. AirPlay:iPhone users can take advantage of AirPlay with projectors that support this feature. AirPlay lets you mirror your iPhone's screen or stream content seamlessly to the projector. Wi-Fi Direct: Some projectors and phones support Wi-Fi Direct, enabling direct wireless connections without needing a Wi-Fi router. This is useful for locations where you might not have access to Wi-Fi. Conclusion Mastering how to connect phone to projector via USB can significantly enhance your multimedia experiences, be it for professional presentations, educational purposes, or personal entertainment. This guide has provided you with the essential steps and considerations for establishing a seamless connection between your phone and projector with USB port. By keeping these in mind and following the guidelines provided, you'll be well-equipped to connect phone to projector using USB effortlessly, making your presentations more engaging, your movie nights more enjoyable, and your overall viewing experience more immersive. FAQs Can I connect my phone to projector with USB cable? Yes, you can connect your phone to a projector using a USB cable, but there are a few things to consider. First, ensure that your phone supports video output through USB. For Android devices, this might require MHL or Slimport compatibility. For iPhones, you'll need a Lightning to USB adapter. Secondly, check if your projector has a USB port that supports video input. Once you have the right equipment, simply connect your phone to the projector using the appropriate USB cable or adapter. How to connect iPhone to projector without HDMI? To connect an iPhone to a projector without HDMI, you can use a variety of wireless methods or adapters: AirPlay: If you have an Apple TV or an AirPlay-compatible projector, you can use AirPlay to wirelessly mirror your iPhone's screen to the projector. Wi-Fi Direct: Some projectors support Wi-Fi Direct, allowing you to connect your iPhone wirelessly without needing a Wi-Fi network. Lightning to VGA Adapter: If your projector only has a VGA port, you can use a Lightning to VGA adapter to connect your iPhone to the projector. Why is my projector not recognizing my USB? If your projector is not recognizing your USB, consider the following: Compatibility: Ensure that your projector supports USB video input. Some projectors only use USB ports for service connection or power supply. File Format: Check if the file format of your content is supported by the projector. Some projectors have limitations on the types of files they can display, like JPEGs or MP4s. USB Format: The USB drive itself might need to be formatted in a specific file system (e.g., FAT32, NTFS) that is compatible with your projector. Faulty USB Port or Drive: The USB port on the projector or the USB drive itself might be damaged. Try using a different USB drive or another USB port if available.  

Christmas deals

Be the First to Know

Featured Products

Sold Out

Cosmos 4K SE | Dolby Vision Projector with Google TV

Cosmos 4K SE | Dolby Vision Projector with Google TV

$1,299.99

Mars 3 | Outdoor Projector with Long Playtime

Mars 3 | Outdoor Projector with Long Playtime

$1,049.99

Popular Posts

  • User Guide ·

  • User Guide ·

  • User Guide ·

  • User Guide ·

  • User Guide ·

Sign In to Receive
the Coupon Below
*Sorry, your account contains sensitive data. Please verify your account by email. Send again Send again in seconds
Register
Already signed up? Sign in Now
Sign In to NEBULA
Quick Sign In
Sign In with Password
or
Please try again in 10 minutes.
A verification email has been sent to your email address, please check it.
We've Sent You a Verification Email
Please check the verification email sent to

You have to verify your account before using it.

The verification link is valid for the next 30 minutes.

There may be a few minutes of delay.

You can set your password in the My Account section.

You can use the email verification link to sign into the website each time.

Didn't receive a verification email? Send again Send again in seconds
Go Back
OK
Sign In to NEBULA
Email address
Password
Forget password?
Send again Send again in seconds
or
Please try again in 10 minutes.
A verification email has been sent to your email address, please check it.
We've Sent You a Verification Email
Please check the verification email sent to

You have to verify your account before using it.

The verification link is valid for the next 30 minutes.

There may be a few minutes of delay.

You can set your password in the My Account section.

You can use the email verification link to sign into the website each time.

Didn't receive a verification email? Send again Send again in seconds
Go Back
OK
Please try again in 10 minutes.
A verification email has been sent to your email address, please check it.
Welcome to the NEBULA Collective
Here's your coupon
  • %
    Off
    Code: COPY
    Cannot be combined with other discounts

1. Your initial password and coupon have been sent to your email address.

2. Verify your email address for account security and credit distribution.Send again Send again in seconds

OK,Get it
Registration Failed
Sorry, your link is not working, please register again!
OK
Enter your phone number to subscribe to SMS alerts.
By subscribing, you agree to receive recurring automated promotional and personalized marketing text messages and phone calls from NEBULA at the provided phone number. Consent is not a condition of any purchase. Reply HELP for help and STOP to unsubscribe. Message frequency will vary. Message and data rates may apply. View Terms & Privacy.
Mobile Number
Incorrect phone number
This phone number is already subscribed.
The interface returns failure and will be skipped after 5 seconds.
Subscribe
Skip