
Most projectors today come equipped with at least one HDMI port to facilitate the transmission of high-definition multimedia signals. Whether you're preparing for a crucial business presentation, organizing a lecture, or setting up a movie night at home, understanding how to connect laptop to projector with HDMI is an essential skill.
This guide will navigate you through the benefits of connecting your laptop to a projector using an HDMI cable, provide step-by-step instructions for both Windows and MacBook users, and share practical tips to ensure a smooth connection process. Let's dive in!
Benefits of Connecting Laptop to Projector with HDMI
Connecting your laptop to HDMI projectors offers a plethora of benefits that can enhance both professional presentations and personal entertainment. Here are some of the key advantages:
- High Video and Audio Quality: HDMI (High-Definition Multimedia Interface) is renowned for its capacity to deliver high-definition video and audio signals through a single cable. This ensures crisp and clear visuals and sound for your presentations, movies, or lectures.
- Simplicity and Convenience: The process of connecting laptop to HDMI projectoris straightforward and eliminates the clutter of multiple cables. With just one cable, you can transmit both audio and video, simplifying setup and reducing potential connection issues.
- Wide Compatibility: HDMI has become the standard for audio-visual connectivity, ensuring wide compatibility across devices. Most modern laptops and projectors come equipped with HDMI ports, making it easy to connect without needing special adapters or software.
- Reliability: HDMI connections are known for their reliability. Unlike other forms of connections that might suffer from signal degradation or interference, HDMI provides a stable connection that ensures your presentation or movie night goes smoothly without technical hitches.
How to Connect a Windows Laptop to a Projector with HDMI?
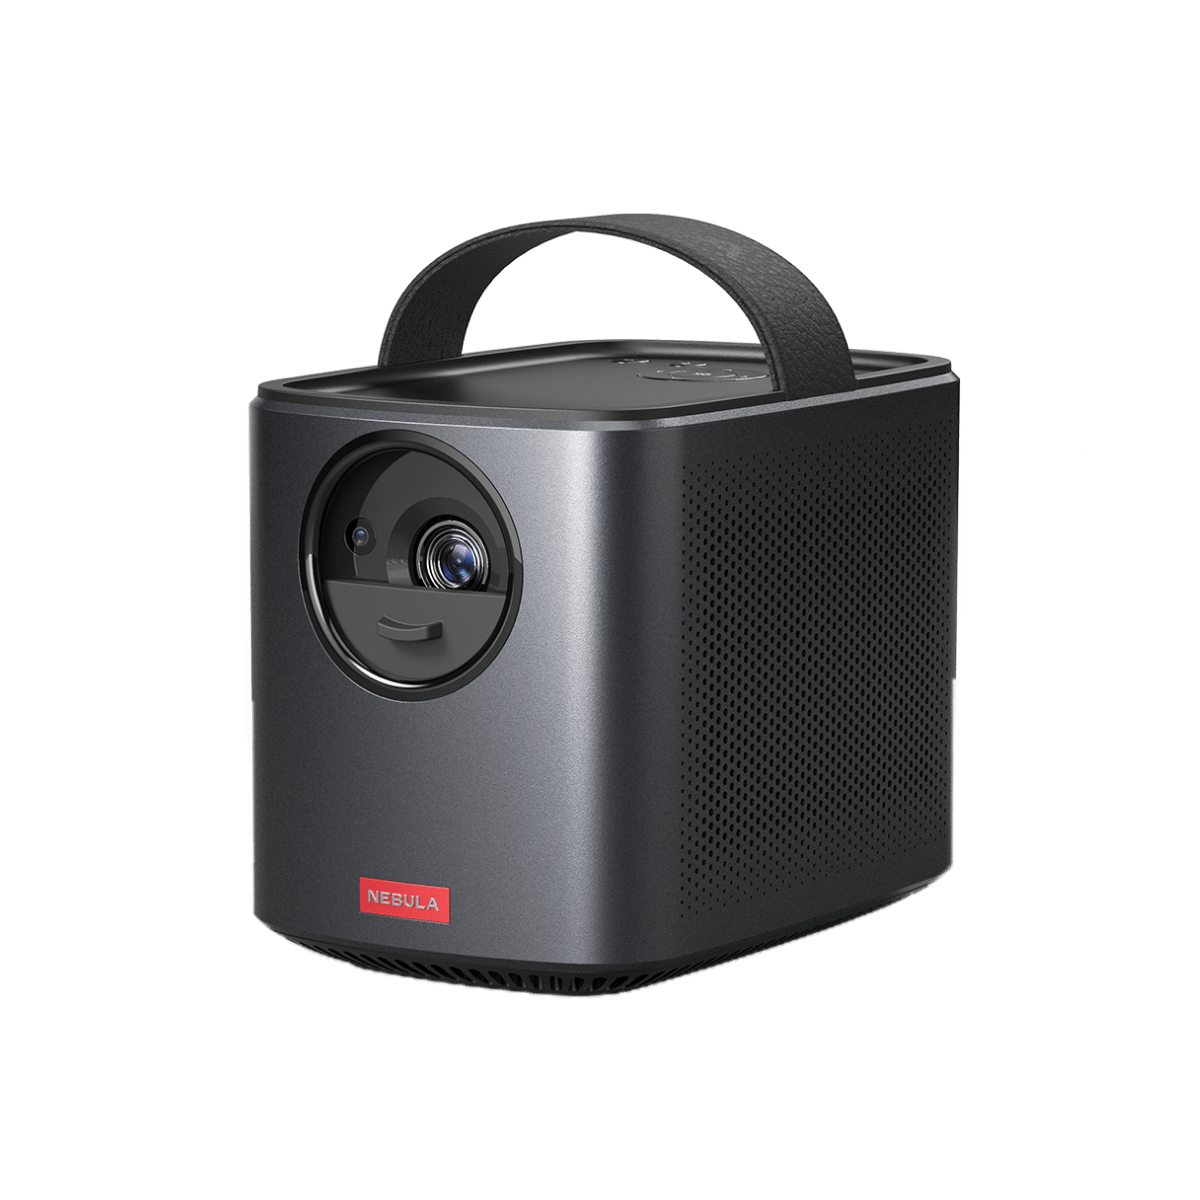
Connecting a Windows laptop via HDMI to projector is a straightforward process that can amplify your presentations or entertainment endeavors. To illustrate the connecting steps, let's use the compact Nebula Capsule Max projector as an example:
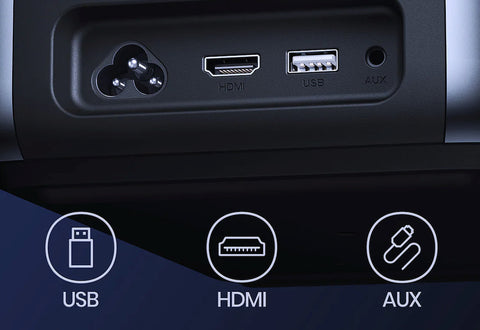
- Prepare Your Equipment: Before you begin, ensure that both your Windows laptop and the projector have HDMI ports. You'll also need a standard HDMI cable. The Nebula Capsule Max is ready with an HDMI port and most Windows laptops have an HDMI port. If your laptop does not have an HDMI port, you may need an appropriate adapter (e.g., USB-C to HDMI or Mini DisplayPort to HDMI).
- Connect the HDMI Cable: First, plug one end of the HDMI cable into the HDMI port on your laptop. Then, connect the other end of the cable to the HDMI port on the projector. Make sure the connections are secure to prevent any signal loss.
- Power On the Devices: Turn on your projector and then your Windows laptop. It's often best to turn on the projector first so that your laptop can recognize it as a display output upon booting.
- Select the Correct Input Source on the Projector: Using the projector's remote control or buttons, navigate to the input source selection. Choose the HDMI port to which your laptop is connected.
- Adjust Your Laptop's Display Settings: Once connected, Windows should automatically detect the projector and may mirror your laptop's display by default. If it does not, or if you wish to change the display mode, press the "Windows key + P" to open the project menu. Here, you can choose from several display options:
- Duplicate: Shows the same image on both your laptop screen and the projector.
- Extend: Expands your desktop across both your laptop screen and the projector, giving you more workspace.
- Second screen only: Displays the image only on the projector.
- Adjust the Resolution (Optional): For optimal display quality, you might need to adjust the screen resolution of the projector display. Right-click on your desktop, select "Display settings," and choose the projector display (usually marked as Display 2). Adjust the resolution to match the projector's native resolution for the best quality.
- Test Your Setup: Open a document, image, or video to verify that everything is working correctly. Adjust the projector focus and keystone correction as necessary to ensure the image is clear and correctly proportioned.
How to Connect MacBook to Projector with HDMI?
If you're using a MacBook, the procedure varies slightly. Here's how to connect Mac to projector with HDMI:
- Determine Your MacBook's Connectivity: If your MacBook has an HDMI port, you can directly use a standard HDMI cable. However, many MacBook models, especially those released between 2016 and 2020, and some newer versions, only include USB-C ports. If this is the case with your MacBook, you will need a USB-C to HDMI adapter to connect your MacBook to the projector. Ensure you have the correct cable or adapter before proceeding.
- Connect the HDMI Cable or Adapter: If you're using an adapter, connect it to your MacBook's USB-C port, then attach the HDMI cable to the adapter and the projector. If your MacBook has an HDMI port, simply connect the HDMI cable directly to both your MacBook and the projector.
- Power On the Devices: Turn on the projector first, followed by your MacBook. This order helps ensure that your MacBook recognizes the projector as an external display.
- Select the Projector's HDMI Input: Using the projector's control panel or remote, select the HDMI input to which your MacBook is connected. This might be labeled HDMI 1, HDMI 2, etc., depending on the projector model.
- Configure Display Settings on Your MacBook: Once connected, your MacBook should automatically detect the projector and may mirror your display by default. If not, or if you want to adjust the display settings:Click on the Apple menu and select "System Preferences." Choose "Displays," then click on the "Arrangement" tab. Here, you have a few options:
- Mirror Displays: Check this box if you want your MacBook to show the same content as the projector screen.
- Extend Desktop: Uncheck the "Mirror Displays" box if you want to extend your desktop across your MacBook and the projector. This is useful for multitasking or showing different content on each screen.
- Adjust the Resolution: For the best viewing experience, you might need to adjust your display settings to match the projector's resolution:
- In the "Displays" preference pane, select the "Display" tab.
- Choose "Scaled" and then select a resolution that matches the projector's native resolution for optimal clarity.
- Final Checks: After setting up, run a quick test by displaying a video or presentation to ensure the visuals and audio are projecting correctly. Adjust the projector's focus and keystone settings if necessary to optimize the image quality.
Tips for Connecting Laptop to Projector with HDMI
Now that you know the basic steps on how to connect a laptop to a projector with HDMI, let's go through some practical tips to ensure a smooth and effective process:
- Use High-Quality HDMI Cables: Not all HDMI cables are created equal. Using a high-quality HDMI cable can significantly reduce the risk of connectivity issues, such as signal loss or interference. Look for cables that are labeled "High Speed" or "HDMI 2.0" (or higher) to support higher resolutions and refresh rates.
- Manage Your Laptop's Power Settings: To prevent your laptop from going to sleep and interrupting your presentation, adjust the power settings before starting. On Windows, you can go to "Power & sleep settings" and set the screen and sleep mode to a longer duration or choose "Never" for both when plugged in. On a MacBook, go to "System Preferences," select "Energy Saver," and adjust the slider for "Turn display off after" to a longer time or choose "Prevent computer from sleeping automatically when the display is off."
- Optimize Audio Settings: Make sure the sound is being played through the projector's speakers, or connect to an external sound system for better quality. On Windows, right-click the sound icon in the taskbar, select "Open Sound settings," and choose your output device. On macOS, go to "System Preferences," select "Sound," and choose the output device accordingly.
- Adjust Projector Settings: A laptop projector has various settings that can affect the display quality, such as brightness, contrast, and keystone correction. Spend a few moments adjusting these settings to ensure the best possible image quality for your audience.
- Check for Firmware Updates: Ensure your laptop and projector firmware is up to date. Manufacturers often release updates that improve compatibility and performance. This can be particularly important if you're experiencing connectivity issues or if you're using newer equipment.
Conclusion
Navigating the digital landscape with ease is more crucial than ever, and knowing how to connect laptop to projector with HDMI can elevate your audio-visual experience. Whether you're a Windows or a MacBook user, the simplicity and efficiency of HDMI connections enhance your presentations, entertainment, and gaming experiences. By following the outlined steps and tips on connecting HDMI projector to laptop, you can successfully configure your devices to ensure flawless viewing. Embrace the power of HDMI, and let your laptop-projector setup be a bridge to a world of vivid visuals and impeccable audio, ensuring your content shines in the best light possible.
FAQ
Can you connect laptop to projector with HDMI?
Yes, you can connect a laptop to a projector using an HDMI cable. Just make sure both your laptop and the projector have HDMI ports. Connect one end of the HDMI cable to your laptop and the other end to the projector. Then, select the appropriate HDMI input on the projector, and your laptop's display should be projected onto the screen.
Why is your laptop HDMI not working on projector?
If your laptop's HDMI isn't working with a projector, it could be due to a few common issues: make sure the projector is set to the correct HDMI input source that your laptop is connected to and try a different HDMI cable to rule out cable faults. Update your laptop's graphics drivers and adjust the display resolution to match the projector's capabilities.


